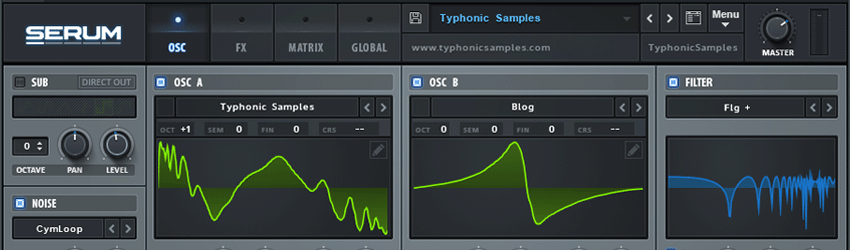
When you start using a new synthesizer it can be a bit confusing and every synth has its own learning curve. In my opinion, Xfer Serum isn’t a hard synthesizer to learn, since it’s really ‘graphic’. You can not only hear but also see a lot of the changes you apply, giving you a better understanding of the parameters and functionalities.
Still some tips and tricks are always useful since they can show you something you might not know, or simply haven’t seen yet. Here are 8 tips and tricks for Xfer Serum every beginner and/or novice should know!
1. Click on a parameter while holding alt+shift to change between <-> and ->
When you want to assign an envelope or LFO to a parameter, you can simply drag the modulation source tile and drop it onto the parameter you want to control. This will create a blue line on the parameter knob, indicating the amount in which the knob will turn. When the destination parameter is centered, the blue line (modulation) will be able to move both ways (bi-directional). When the parameter is not centered, the modulation will be set to move only one way (uni-directional).
However, Serum gives you control over this feature; when clicking on a parameter knob while holding alt+shift you can change this blue line
(modulation setting) to both ways. This way you can change between -> (one way) and <-> (both ways)
2. Click on a parameter while holding crtl to restore its default value
Instead of double clicking on a parameter like in Massive and Sylenth1 to restore a parameter’s default value, Serum has the option to change a parameter back to its default setting by simply holding down the ctrl key and clicking on the desired parameter!
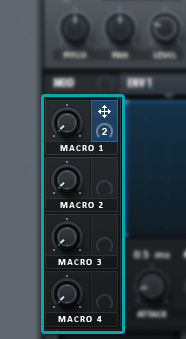
3. Use Macros!
Like most synths, Serum has macros for you to set up. Most presets will already have them set up, but I strongly recommend to set up your own macros so they will fit nicely into your production(s).
When you click and hold the right side of the macro knob, you can drag and drop this to almost any parameter within Serum. There is no limit on how many parameters you want to control with 1 single knob. Using automation clips on your custom macros can really give your productions the professional sound you are looking for!
4. Copy an oscillator
You can copy a complete oscillator from A to B or from B to A with the Menu button on the right side of your selected preset. This saves you the hassle of saving the wavetable and copying the parameters manually.
5. Create custom noise sounds
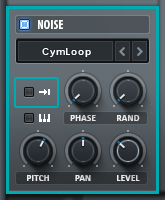
The default noises in Serum are quite good. But Serum doesn’t give you the option to load in custom noise sounds within the VSTi. A workaround for this is placing the .WAV files into the directory of the default noises. You can find this folder where you installed the Serum factory content.
This way you can make any sound into a noise in Serum and really make your own unique sound. For example a piano or guitar hit with lots of reverb.
There even is a loop or one-shot mode for noises, see image. When enabled it’s in one-shot mode, which plays the noise only once from beginning to end. This is useful for short noise sounds that can give your sound a nice attack.
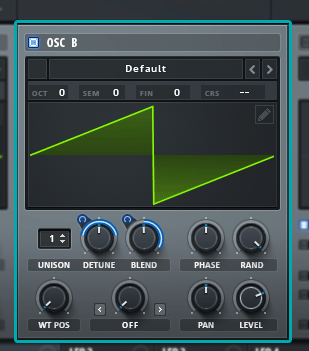
6. Unison, Detune & Blend
These are rather basic parameters you probably are already familiar with, however I still think these are worth mentioning in this list as they can really shape your sound from being a single and narrow wave to a wide and open one.
Unison is the number of ‘voices’ your oscillator has and Detune determines how close or apart these voices are. Don’t open Detune too much as your sound will get out of tune. With blend you can adjust the levels of the voices.
7. Matrix – LFO to master
In the matrix tab of Serum you will see all the connections you’ve made between parameters and modulators. However, this tab gives you a couple extra features. When you for example want to connect a LFO to the pitch of the master out, this is the way to go. At first it can be a bit confusing, but it will quickly become clear. Just try a couple of combinations or see how the matrix looks when you have only one macro assigned to a parameter like WT Pos.
There’s a lot more possible in Serum’s Matrix tab and we will make a tutorial about this in the near future!
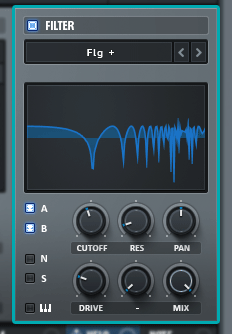
8. Serum’s Main Filter
Serum comes with some great FXs and two filters. One is in the FX tab, the other is next to the two oscillators. This one has a screen where you can see the edits you make. On top of that you can choose the type of filter you want – I recommend to check them all out. But there’s one section I want to show you, the ‘multis’.
Multis are 2 or 3 types of filters, the letters refer to the first letter of each single filter type. So LB is a Low pass Band filter. When you’ve selected a double filter type like LB, the Cutoff knob is for the first letter (Low Pass) and the Freq. knob is for the second letter (Band).
Playing with these parameters and assigning LFOs to them can give you big moving sounds which are often used in genres like Dubstep and Future Bass.
Conclusion
I hope this article has taught you some tricks that will improve your sound design and music productions. In a few days there will be another Serum Tips and Tricks article, this time focusing on Wavetable Design. Follow our Facebook and/or Twitter to stay up to date with all of our developments!
need help with serum i hope that you can help me i can type preset name in serumfolder
Sorry Martin, I don’t understand the question. Can you ask it again with extra information?