This is the second episode of the Music Production Series. For a new visitor jumping straight into this episode, I recommend checking out the previous episode if you haven’t already!
The goal of the Music Production Series is to gradually go in depth on the topic of producing tracks. Music production is a versatile subject, and knowing what to do technically when it comes to producing, will make a huge difference.
To recap quickly, in the first episode of this series we discussed a couple of key factors for mixing and balancing your production:
1. Panning
Utilizing the left and right earphone or speaker. You can make your sound go more to the left or right. Sounds will have to fight less over position and panning your sounds can give a nice Depth of Field.
2. Equalizing
Filter your sounds individually (or grouped) to make sure your sounds sound dynamic, clean and crisp by eliminating disturbing and pressuring frequencies.
3. Muddy Bass
Make sure that the bass in your track is clean. A muddy bass can occur when the bass sounds in your track are overlapping in frequency.
These three points are key aspects of properly balancing your track. These points will definitely keep re-occuring throughout the series as they form the fundament of a ‘good’ track! Check out Ep. 1 for more details! Equalization of sound is a topic that I will adress in the next episodes.
Alright, lets jump into it!
Automating. Or Automation/Automation Clips.
Have you ever wondered how tracks on the radio have a build up where a sound ‘opens up’ towards the drop? (And sometimes quickly closes again after the drop). This is done with automating your sound.
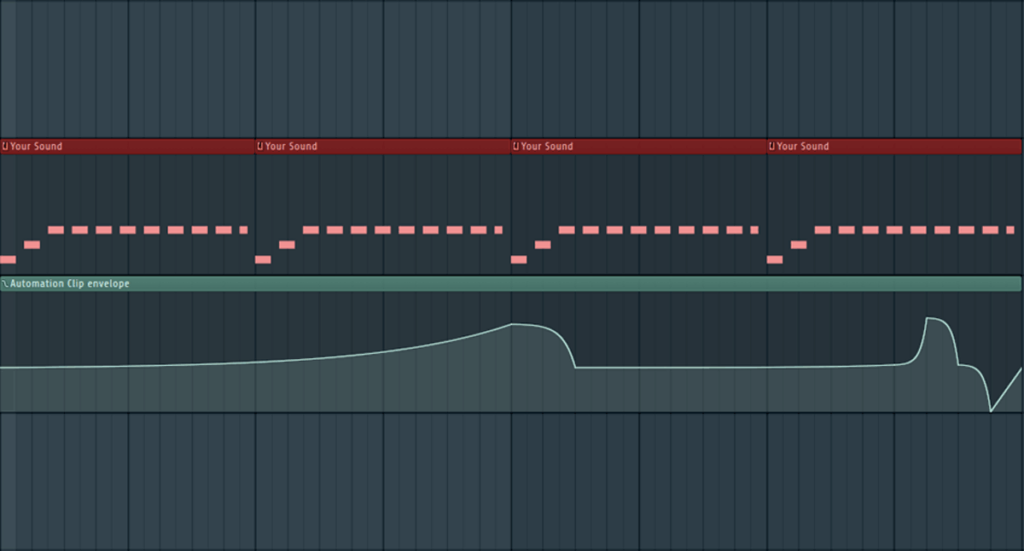
An automation clip is a clip linked to a parameter (knob) in your DAW. It can be anything you like. A parameter of a synthesizer (for example the ‘cutoff‘) or even the volume or pan knob of a sample. As the automation clip is linked to the knob, the knob will react when you change the value of the clip. To make it a bit more understandable: manually moving a knob that affects your sound, will now be done by the clip automatically! The way the knob moves is all up to you! It depends on how you set the values of your automation clip.
Note: Each music program operates differently, and setting up an automation clip therefore is done differently per program. The internet will help you out with this one!
Automating your sounds can do wonders for your productions, it will let your sounds sound more alive. In my opinion every track could use automations, so definitely mess around with it. You might already have came to a point where you were twisting a certain knob and wanted that effect in your track. This is possible with automation! The beauty of it is that an automation clip can be as simple or complicated as you want. Even the smallest adjustments can make your track pop! For example, you can make sounds wobble in all sorts of ways or you can make an epic build up with an explosive drop.
A neet trick is to automate a parameter in your equalizer.
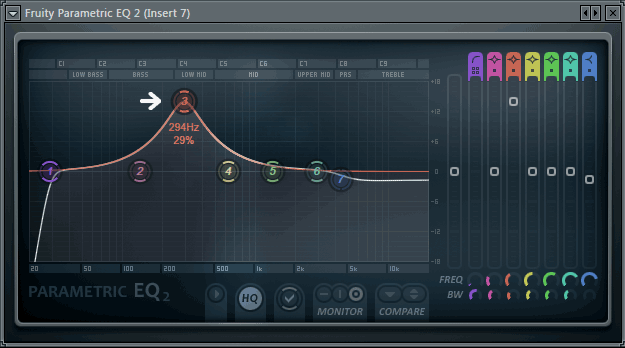
Try to up a certain range in your equalizer with a pointer and then automate the left to right/right to left function (in the image you see a arrow pointing towards a possibly pointer you can do this with). This can induce a crazy sweeping effect of your sound! – Often used in heavy dubstep tracks, but definitely in other types of productions as well.
Hey, keeping it short and sweet this time. Be on the lookout for the upcoming episode(s) on the topic of equalization! Also upcoming; compression, reverb and more. Follow our Facebook or Twitter to stay up to date!
Have a great day!